
The Guitarist's Survival Guide: Introduction to Recording Acoustic Guitar
As I've previously written about here, setting up your own home studio has never been easier. The benefits are many – the convenience, the cost savings, and the joy of creating something that is unique to you – it's very fulfilling. But here's the secret: a great recording starts with a great performance. Don't try to fix everything in the mix. Nail it at the source and you'll save yourself a ton of headaches later. With that said, let's explore some techniques for recording acoustic instruments such as acoustic guitar. You'll be amazed at the diverse sounds you can capture by strategically placing a microphone. Today we will look at some techniques to mic an acoustic guitar, though these should work nicely for other instruments such as mandolin, or ukulele.
What mics do I need?
We’ll be discussing specific microphones, but don’t feel limited! Use whatever microphone you have on hand – experiment, have fun, and see what sounds you can create. I’ve recorded with all sorts of mics over the years, and some of my favourite recordings were made with whatever happened to be available at the time.
The performance is always more important than the fidelity of the recording! Ain’t you ever heard some classic blues records?!
Condenser Microphones
- Think of them as sensitive ears: Condensers are highly sensitive microphones, capturing the subtlest nuances of sound with incredible detail.
- They need power: Unlike dynamic mics, condensers require "phantom power" (48V) to operate, usually supplied by your audio interface.
Two main types:
- Large-diaphragm condensers – These have a larger diaphragm, resulting in a warmer, smoother sound. They’re often used for vocals, acoustic guitar, and other instruments that benefit from a rich, full-bodied tone.
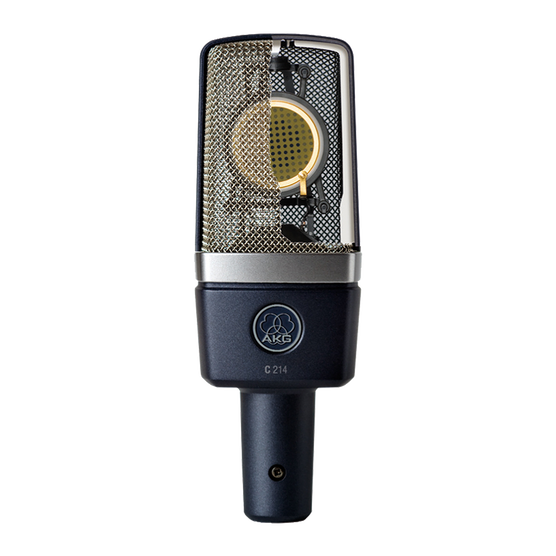
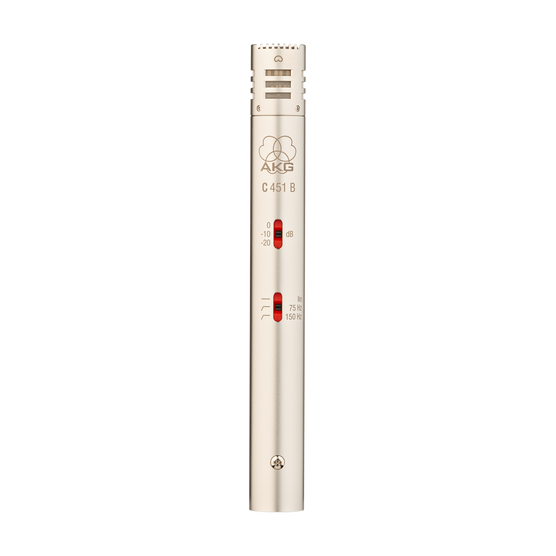
- Small-diaphragm condensers – These are more sensitive to high frequencies and transient sounds, making them ideal for recording acoustic instruments like guitars, drums, and percussion.
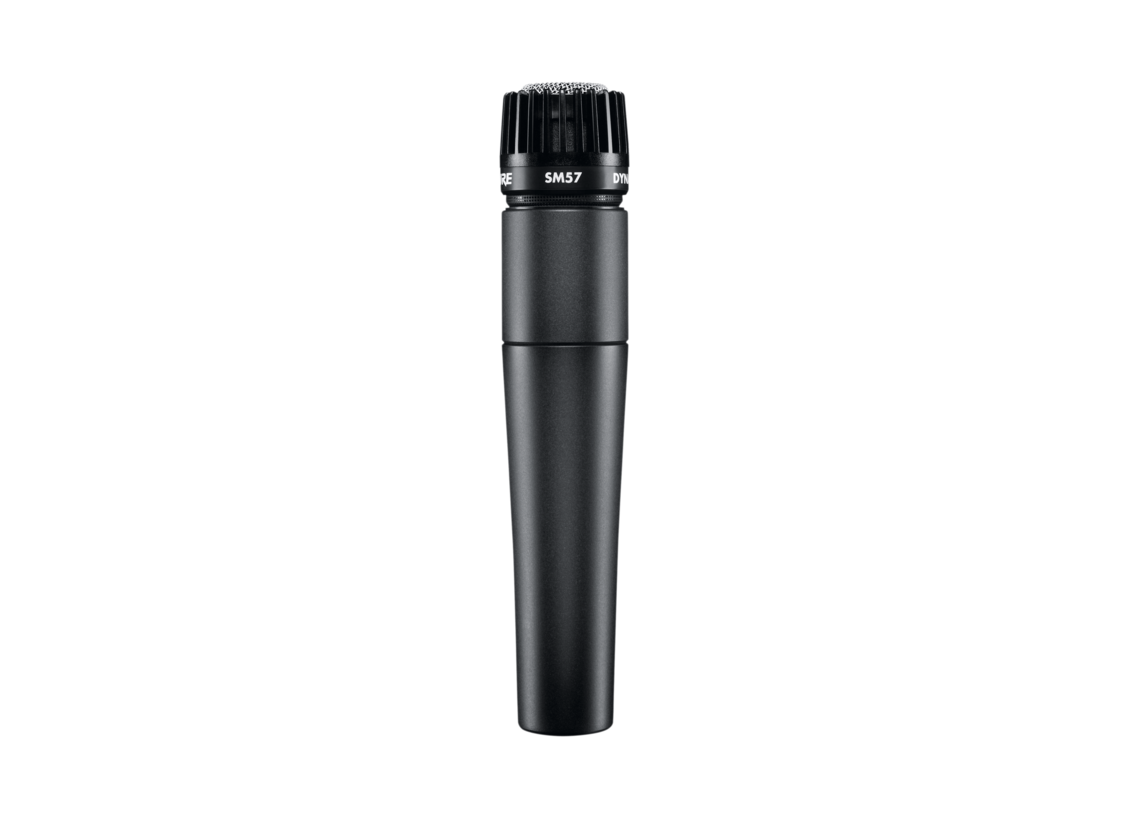
Dynamic Microphones (e.g. the legendary SM57)
- Built for the stage: These mics are rugged, durable, and capable of handling high sound pressure levels, making them ideal for live performances.
- No need for phantom power: They work without external power, making them easy to use in various situations.
- A classic for a reason: The SM57 is a legendary dynamic microphone known for its versatility – it captures everything from guitar amps to vocals to drums.
Recording a Guitar
The beauty of our chosen instrument, the acoustic guitar, lies in its depth and versatility. How you choose to play it significantly impacts the final recording. The kind of pick you use is probably the biggest factor in shaping the overall sound – it can add a percussive edge, while fingerstyle playing creates a more intimate sound. Experiment with both techniques to see what best suits your style and the song.
A word of advice: Avoid recording directly from the guitar’s pickup if possible. It tends to sound… well, awful – quacky and hollow. Steer clear unless absolutely necessary.
Quick Tip: Never point the microphone directly at the soundhole! This results in a boomy, overly bass-heavy sound. Take my word for it – it’s not pleasant. Actually, scratch that – don’t take my word for it. Experiment yourself! These are just guidelines, so don’t be afraid to break the rules and discover unique sounds.
Mic Placement Techniques
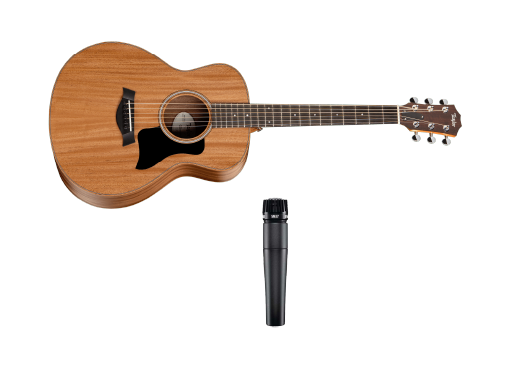
1. Mic at the 12th Fret:
How: Place a small-diaphragm condenser microphone about 6-12 inches away from the 12th fret, angled slightly toward the sound hole. This position captures a balanced mix of the guitar's body resonance and string clarity. The 12th fret is a common sweet spot, providing a natural and detailed representation of the guitar's tone.
Pros: Clear and balanced sound.
Cons: May require adjustments to avoid excessive fret noise or boominess.
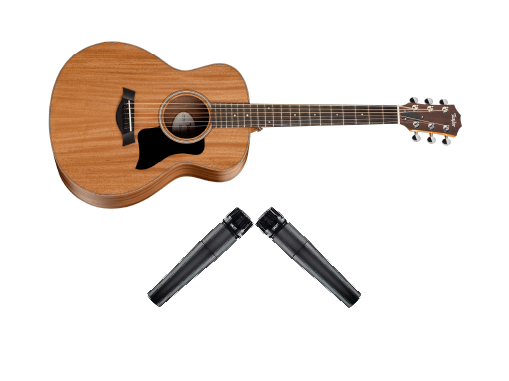
2. Stereo with 2 Mics (Coincident Pair):
For those airy, spacious tracks, a stereo technique can really make your recording shine.
How: Use two condenser microphones in an XY stereo pattern. Position the mics about 12 inches away from the guitar, with one mic pointing at the sound hole and the other at the 12th fret. This setup captures a wide stereo image and a more immersive sound.
Pros: Rich stereo field, captures depth and detail.
Cons: Potential phase issues, requires careful placement and monitoring.
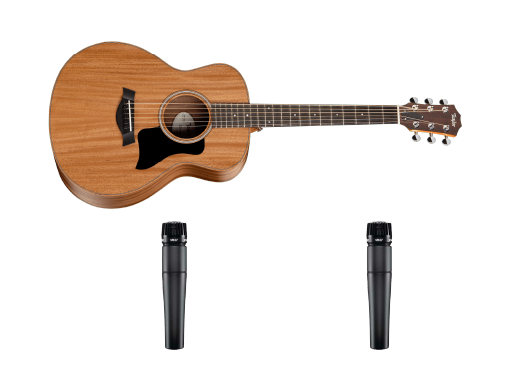
3. AB Technique (Spaced Pair):
Uses two microphones spaced 3-10 feet apart.
Pros: Creates a wide and spacious stereo image, captures the sound of the room.
Cons: Prone to phase issues if not set up correctly (use the 3-to-1 rule: distance between mics should be at least three times the distance from each mic to the guitar). Can produce a "hole in the middle" if the mics are spaced too far apart.
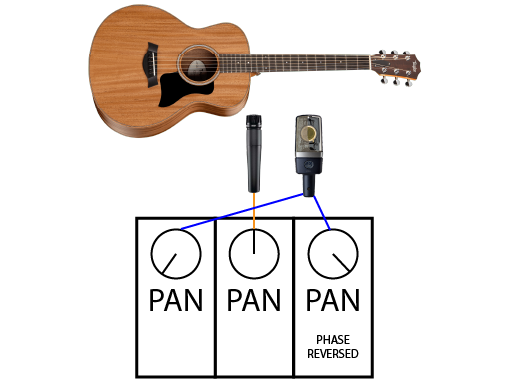
4. M/S Mic Technique (Mid-Side)
This is a little more challenging but worth the effort.
The Core Concept:
This technique uses two microphones: a cardioid mic facing forward (Mid) to capture the central sound, and a figure-of-eight mic facing sideways (Side) to capture the stereo information.
Creating the Stereo Image:
The Mid signal represents the centre of the sound. The Side signal captures the sounds coming from the sides.
To create the stereo image, you need to process the Side signal. You can use a dedicated M/S decoder, or you can achieve a similar effect in your mixing console:
- Duplicate the Side signal.
- Pan one copy hard left and the other hard right.
- Reverse the phase of one of the panned Side signals.
Pros: Captures a strong central image, ensuring clarity and focus in the mono mix. The Side signals cancel each other out when summed to mono, resulting in a clean and balanced mono mix.
Cons: Requires careful setup and processing to achieve optimal results.
Controlling Stereo Width:
- Increasing the level of the side signal widens the stereo image.
- Decreasing the level of the side signal narrows the stereo image, focusing more on the centre.
Some General Tips
- Mic Placement: Experiment with different mic placements to find the best sound for each instrument. Small adjustments can make a significant difference in the recording quality.
- Room Acoustics: The room where you record plays a crucial role in the final sound. Using acoustic treatment, such as foam panels or diffusers, can help control unwanted reflections and improve the overall recording quality.
- Gain Staging: Proper gain staging ensures that your recordings are free from distortion and noise. Set the input levels on your audio interface or preamp to capture a clean signal without clipping.
- Monitoring: Use high-quality headphones or studio monitors to accurately hear what you're recording. This will help you make informed decisions about mic placement and settings.
Now that you have some recording techniques under your belt, go forth and record something. I’ve been singing this song a lot, but just remember – the recording techniques, the equipment and the gear – they're supposed to work in service of the music. So just go and make some, record it, and share it!
If you have found an error or typo in the article, please let us know by e-mail info@insounder.org.


