Tuning Drums: Some Advice for Beginners
Writing an article about drum kit tuning seemed pretty easy to me. Until I realized how much of an individual affair it actually is. That there are dozens of ways and each drummer tunes to his own taste. In short, give one kit to ten different drummers to tune and it will sound different every time.
The tuning of the drums naturally always corresponds not only to the style of music and playing technique, but also to the player's personal feeling. How to overcome this? Although every drummer likes to have "their" tuning, there is a basic maxim that most drummers stick to, which could greatly help beginners in particular in finding their ideal sound.
Before we start...
Before discussing the tuning of the drums themselves, let's at least get acquainted with the membranes (also called drum skins or drumheads) as such. There are three basic types: sand (coated), clear, and black (ebony). Coated membranes are relatively thin and are characterized by a warmer and fuller sound, clear membranes have a bright, clear, open sound and can withstand more vigorous playing, ebony membranes are also clear in sound, but much darker than the clear ones due to their greater thickness and the material used.
The choice of membranes is therefore a matter of taste, desired tone and, last but not least, musical style. For example, a jazz player will certainly choose the coated type, which thanks to its sandblasting is ideal for playing with brushes.
And let’s get tuning...
First, let's explain a bit about the function of drumheads. The upper (or playing) membrane gives attack and punch to the sound of the drum, while the lower (or resonating) membrane affects the reverberation and tone color. It should be understood that while the drummer, sitting above the kit, hears mainly the sound of the playing membranes, the audience, which is mostly below the stage, hears mainly the sound of the resonating membranes. Thus, it is clear that both membranes are equally important and should be given equal attention. Fortunately, the days when it was fashionable not to use resonating membranes at all are long gone.
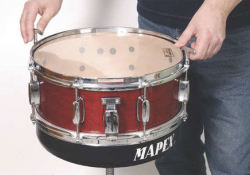
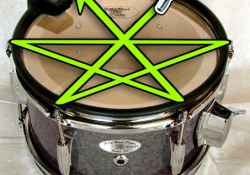
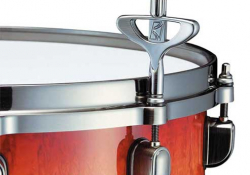
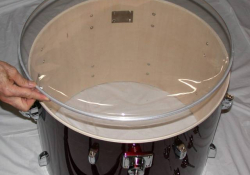
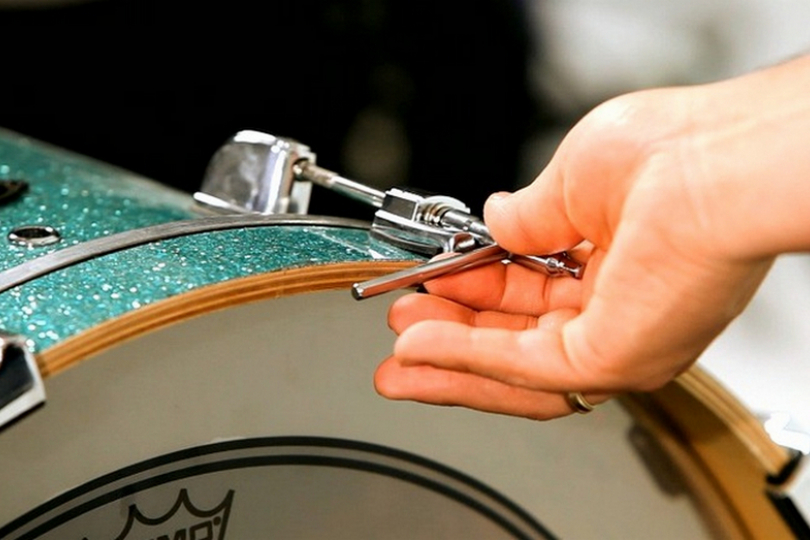
Let's get tuned up. Let's assume that we've got brand-new drumheads in our hands. We check the "stripped" drum body without the skins and rims (especially the condition of the edges on which the skin sits—they should be free of any unevenness) and first fit the resonating membrane. Place the drum, playing side down, on a soft pad and place the resonating membrane on top of it. Put the screws on and start tightening, using the cross system—always two opposite screws. Tighten them until they touch the rims. I recommend this system especially for beginners, more advanced drummers sometimes choose the circular tuning method—but this requires some experience and sometimes you can even find tuning with two wrenches.
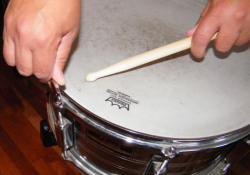
Then start tightening the drumhead very slowly, ideally after half a turn. This is important for proper placement. Lift the drum and lightly strike the skin; it should sound clear and deep, without disturbing sounds. If it doesn't, we can tighten it up another half turn (again using the cross system). Then put the drum back down and tap the tuning key on each screw to check that the tuning height is the same everywhere. If not, tune the screws to the highest note found each time.
So always tighten upwards, never loosen the screws! If you are using REMO drum skins, be sure to press the centre of the skin with your palm after tightening to loosen the binding (you will hear a cracking sound) and then repeat the whole tuning process. This is not necessary for other brands of skins. Ideally, the skin should now be allowed to settle for a couple of hours and adjust to the edge of the drum. If you're going into the studio, I definitely recommend doing this.
Once the skin is in position, loosen the screws again until it stops resonating and then retighten the screws, this time at a quarter turn until the skin has a clear but deep tone. Now turn the drum over, place it with the resonating membrane back on a soft surface and position the playing membrane in the same way. Once tightened and seated, we loosen the skin again until the resonance is lost, and tune to a deep, clear tone after a quarter turn.
Then we can start tuning to the tone we want. We just need to tune very carefully, because if we "stretch" the drumhead too much beyond its maximum, the drumhead will lose resonance and density, it will not be possible to retune it and it will start to dangle. If you don't find any clear sound during tuning, it may be due to overstretching of the skin, uneven tightening of the screws, unevenness on the edge of the drum, or a bent rim.
This is where the real drum alchemy comes in. The final pitch to which the drum will be tuned must be determined and found by each individual through the familiar method of trial and error. Every drum sounds best in a different position and in a different tuning, and it's always about the process of finding it.
Tom toms and floor toms
First, tune both toms (top and bottom) to the same pitch. Most drums sound good when both membranes are tuned to the same pitch. Then tune both skins up in parallel. If you are not satisfied with the sound and do not find your ideal sound, loosen the bottom membrane back to a deep tone and tune the top membrane higher. The sound of the drum will become louder, but also a little thinner.
If we reverse the process and tune the top membrane lower, the sound will be fuller, but it will lose punch and the sustain will be shorter. Another option is to tune the top membrane to the middle and tune the bottom membrane higher. This will result in a longer sustain. But everything also depends on the diameter of the drum and, of course, the choice of drumheads.
Bass drum
In this case we have even more variety in tuning than with toms or floor toms. In addition, we have a choice between a full resonating membrane or one with a hole in it, which has a significant effect on the resulting sound. Thanks to the hole, the air escapes faster and the pressure inside the drum is not so high. This radically shortens the length of the tone and gives the drum more attack and concreteness. This produces a sound characteristic of metal or similar harder styles.
On the other hand, a full membrane gives the drum a full and dense sound with a large amount of bass and long sustain (which can be dampened by a damping ring or by stuffing the drum with a blanket or foam), especially suitable for jazz or fusion. An unmuffled, highly tensioned membrane of a bass drum gives a midrange sound with a sharp attack, a medium tensioned membrane (with possible light damping) will give a classic rock sound and finally a tuned membrane will give us a sub-bass, slappy sound.
Snare drum
In the case of the snare drum, it is already an established standard that both membranes are tuned relatively high, while the bottom membrane can be tuned even higher than the playing membrane to avoid the drum sounding too long. A tightly tensioned playing membrane then ensures that the drumstick bounces properly.
However, if you loosen the skins on a snare drum, the result is not necessarily bad and you can achieve a darker sound. Of course, the diameter of the drum and the chosen material (wood, metal) play a big role here again. A low drum (up to 4.5") is tuned more to the treble, a deep drum (up to 8") can tolerate even light tuning. However, even here it is worth experimenting and exploring.
A few helpful hints to conclude
1. Remember that we tune drums differently for a gig and for the studio. In a large hall, the long sustain of the drums will multiply and become fuzzy and indistinct. It is therefore advisable to equip the kit with double-layered drums for concerts, which have a shorter and more muted reverb.
2. When performing live, try to hear your drums from the perspective (or rather hearing) of the fans below the stage. Tune your drums so that they sound good to both sides (i.e. to the stage and to the room). Ask your bandmates to play the drums for you and listen to the sound under the stage and in other parts of the venue.
3. Don't try to tune your drums to the sound of your drum idol from the recording. The sound of drums is often altered after recording and is virtually impossible to achieve in "live" conditions.
Has this article been helpful for you? Let us know in the comments below.
If you have found an error or typo in the article, please let us know by e-mail info@insounder.org.

