
Under the Hood #10: Truss Rod on Fender Guitars
For the Under the Hood series, I would like to take a closer look at the truss rod on Fender guitars. Though the truss rod isn't visible, its presence is essential. Over the decades of production, the location of the brace has varied, and each location has its own specifics for adjustment. Let's take a closer look at how it works and how to optimally adjust it on Fender guitars.
The first Fender Esquire models lacked truss rod, and almost immediately customers started returning guitars to the factory because their necks were warped. There were about fifty of these guitars and they subsequently became valuable to collectors. After that, all Fender guitars had neck bracing and this solution was really effective.
Why truss rod
The neck brace, or truss rod, is hidden in the hollow of the neck. It serves to stabilize the neck to prevent unwanted and spontaneous deformations. The most common material used is steel.
The neck brace serves as compensation for string tension. The strings have a tension of several tens of kilograms after tuning, which is quite a load for the neck wood. The thicker the strings you put on the guitar, the more tension, and consequently the greater the load on the neck. Wood is a flexible material, and if it weren't for the bracing, the neck would be so evenly curved that the strings would be too high above the fingerboard and the guitar would become unplayable.
Another reason why bracing is important is that it protects the guitar against unwanted neck deformations due to environmental changes. Wood is a material that constantly responds to climatic changes in the surrounding environment. When exposed to excessive humidity, it absorbs water and its volume increases. A dry environment has the opposite effect on wood: it dries it out and its volume decreases. Cold and heat also affect the condition of wood. Significant changes in temperature can cause wood to crack.
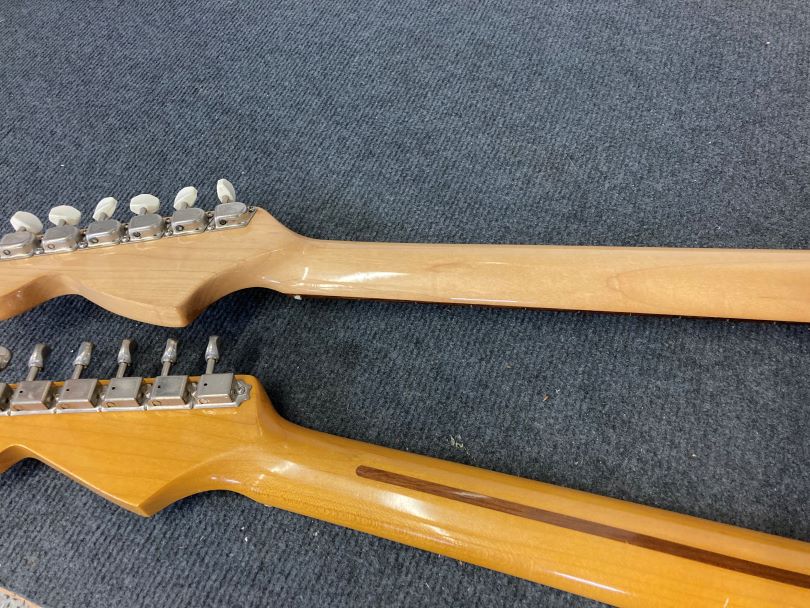
Skunk Stripe
An inherent feature of Fender necks is the skunk stripe, which Fender describes very nicely and concisely in this article on their website. Because Fender guitars had all necks made of a single piece of wood until 1958/59, the bracing was inserted into the inside of the neck in a pre-milled channel that ran the length of the neck up to its end. After the brace was inserted, the channel was sealed from the back of the neck with a walnut strip of wood. Everything was then sanded and varnished.
Skunk stripe is the classic brown strip of wood running along the back of the neck. But it wasn't always there. Once Fender started using rosewood fingerboards in 1958/59, the skunk stripe was no longer needed.
Because the rosewood fingerboard was glued to the rest of the neck, a brace was inserted beforehand, though this time from the top of the neck directly under the fingerboard. It was no longer necessary to mill the channel for the brace from the back of the neck. So in the '60s, Fender necks don't have skunk stripe.
In 1971, the design of the brace was changed—this time, it wasn't on the back of the neck, but on the headstock. This design caused the skunk stripe to reappear on the back of the neck, regardless of the fingerboard material.
Modern Fenders usually have a skunk stripe. Special reissue models may not have it. It always depends on the specific model the guitar is made to today.

Truss rod placement on a Fender
That being said, Fender has always used neck bracing on all but a few of its early models, and its placement has changed over time. The end of the bracing on Fender guitars is either at the headstock or at the butt end of the neck.
Both locations have their own specifications, especially when it comes to making adjustments. If the brace is on the headstock, it is more easily accessible. A suitable Allen wrench is all that is needed to adjust it. However, if the truss rod is at the end of the neck, you have two ways to get to it: either unscrew the neck or if it is a Telecaster, sometimes all you need to do is remove the pickguard. I'll describe everything in more detail below.
Truss rod on the headstock
If the end of the brace is placed on the headstock, the advantage is that it is very easy to access the neck setup. You don't have to unscrew the neck or loosen the strings to make adjustments—just take the appropriate tools and start adjusting.
Fender didn't start using this placement until the aforementioned 1971 when the bracing design changed. The end of the brace was now visible on the headstock and resembled the shape of a bullet—hence the name Bullet truss rod. The interim period in which necks were made this way lasted until 1978 and falls during the era when Fender was owned by CBS.
In the following years, the bullet design was abandoned and the adjustable end of the brace was again hidden roughly under the zero fret in a walnut strip of wood.
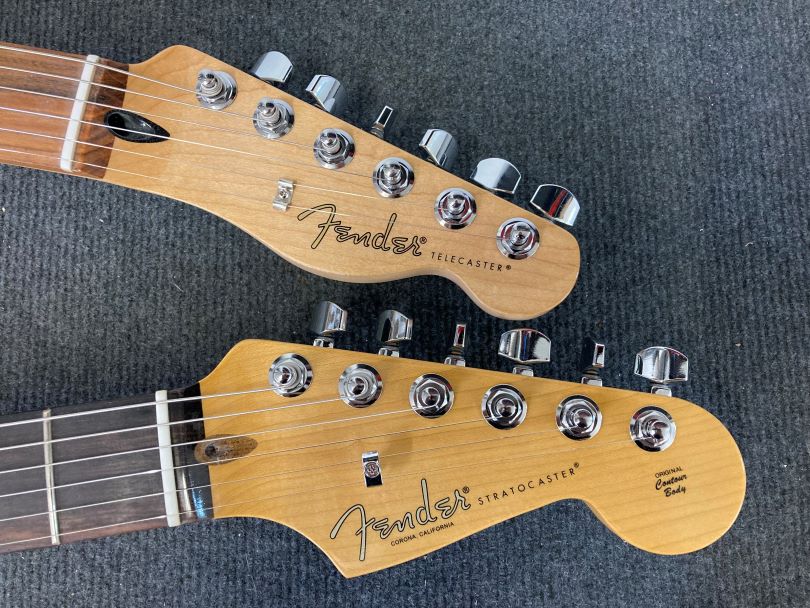
Just for the record, Fenders made in the USA always have the adjustable brace end in walnut. You can tell by the typical brown color. Fenders made in a Mexican factory don't use walnut. You can tell by looking at the brace on the headstock, which is set in black plastic. This information is useful for anyone who wants to distinguish an American Fender from a Mexican one at a glance.
How to adjust the truss rod on the headstock of a Fender
Fenders require a special Allen wrench to adjust the bracing. Be careful, the size is not always the same. Fender uses two sizes of adjustment wrenches. American models with Bullet bracing from the '70s and later models with walnut binding are adjusted with a 1/8 inch wrench.
The bracing on Mexican Fenders or some basses is adjusted with a 3/16 inch wrench. So the dimensions are different on American and Mexican Fenders, which is another feature that makes it easy to distinguish a US model from a cheaper model.
Different Fender copies and Japanese models may have different bracing and it is always necessary to find the right key to set them up. Testing should always be done very carefully to avoid damaging the threads. Repair is of course possible, but it is a complicated intervention. To determine the appropriate adjustment wrench, I recommend visiting a specialist guitar service, where they will be happy to advise you.
Truss rod at the heel
The traditional location of the neck brace on Fender guitars is at the end of the neck. I call this placement traditional, but it's also quite problematic. It's traditional because it was on the first Fenders that became iconic, the ones from the '50s and '60s. It's problematic because if you want to adjust the bracing, you have to loosen the strings and unscrew the neck. And that's no joke.
As already mentioned, the placement of the adjustable end brace at the end of the neck was typical of Fenders from the beginning of production until 1971, when the brace design changed to the so-called Bullet truss rod. In the 1980s, Fender fell into the hands of new owners and the design slowly changed back. However, as Fender began to produce reissue models in these years and also began to combine different construction methods used in the past, the neck bracing placement varied from model to model.
How to get to the adjustment of the brace at the end of the neck
As I have already mentioned, the location of the brace at the end of the neck means a complication when making adjustments. In most cases the neck must be unscrewed from the body to make the brace easily accessible. You can even venture to make the adjustment yourself if you are experienced and confident that you can put the guitar back together correctly.
How to do it? The first step is to loosen the strings. Loosen them so that they have almost no tension. To keep the strings from falling out of the tuning machines, I recommend using a capo, which you can place near the first fret. It will secure the strings between the zero fret and the tuning machines so the strings can't fall out of the winding.
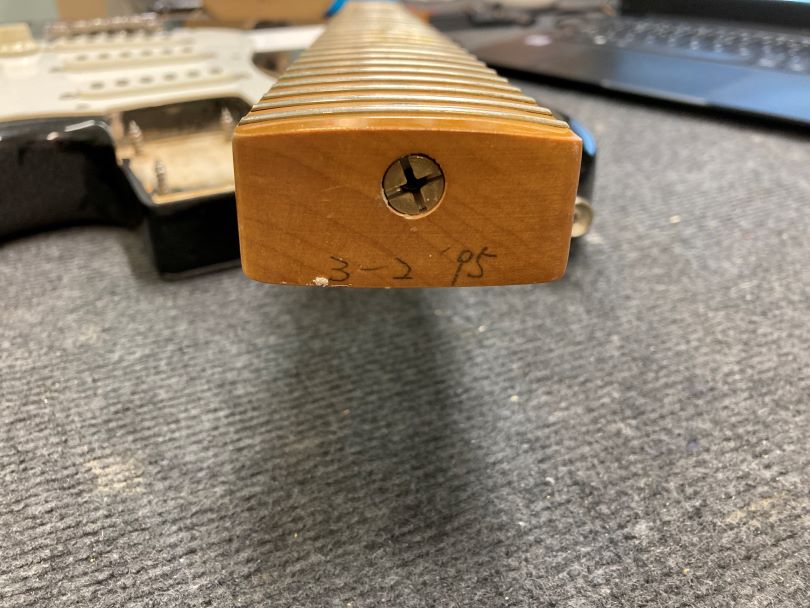
The second step is to unscrew the neck from the body. The neck is screwed in place with four large screws on the back of the guitar at the joint between the neck and body. If you have a '70s Fender, the neck is screwed on with only three screws. After unscrewing the screws, you can remove the neck from the body pocket. This has to be done really carefully so as not to damage the lacquer on the edges of the body when pulling it out. If the neck is tight in the body pocket, slide it out slowly, you can pry it up and down a little. But as I said, be careful of the paintwork so it doesn't chip.
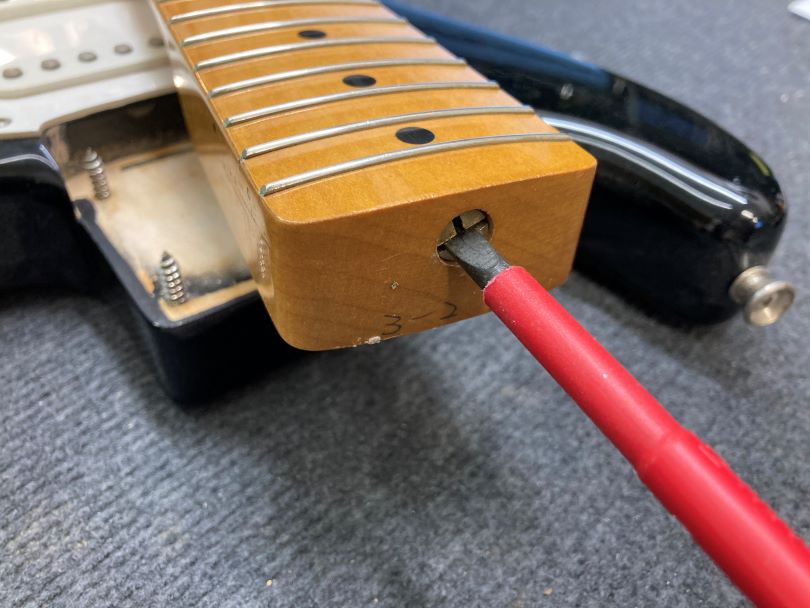
The third step is to adjust the brace itself. The end of the brace has a cross shape, into which you can insert either a large flat-head or a large Phillips screwdriver. Use caution when turning the brace, and use good quality tools so that the screwdriver slots are not damaged. This is because it is more than likely that the neck will need to be adjusted repeatedly, so it is important not to damage anything.
The fourth step is to place the neck back into the body pocket. The neck must fit perfectly against the base. I recommend doing this procedure while resting the guitar on the table on the strap grip behind the fingerboard, with one hand holding the guitar at the neck/body joint. With the other hand, you then attach the screws to the holes and screw them in. If the screws are left improperly tightened, the neck could break with string tension.
Then all you have to do is adjust and assess the geometry of the neck. If the neck is not set up the way you would like it to be, the process must be repeated. I recommend having a guitar repair shop do this adjustment.
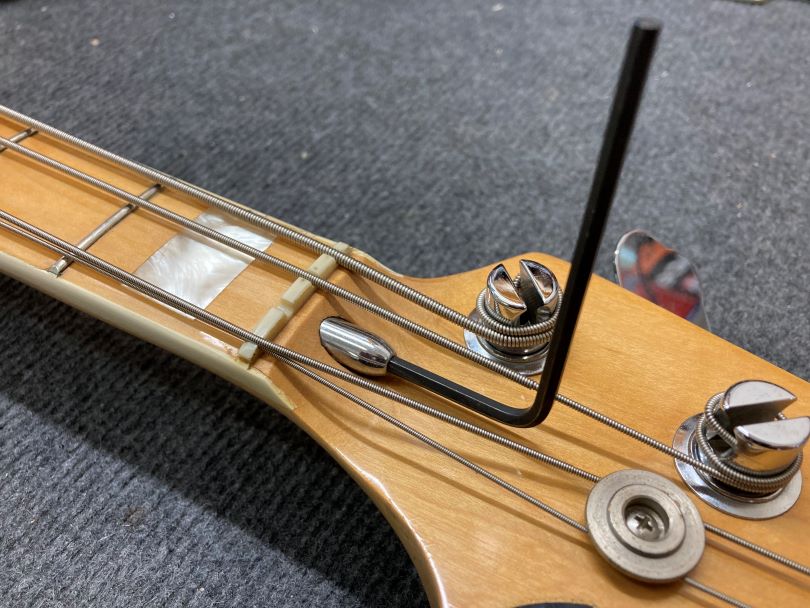
Truss rod at the end of the neck on modern Telecasters
The exception to the complexity of adjusting the truss rod at the heel is modern Telecasters. With these, you no longer have to unscrew the neck from the body. How does it work?
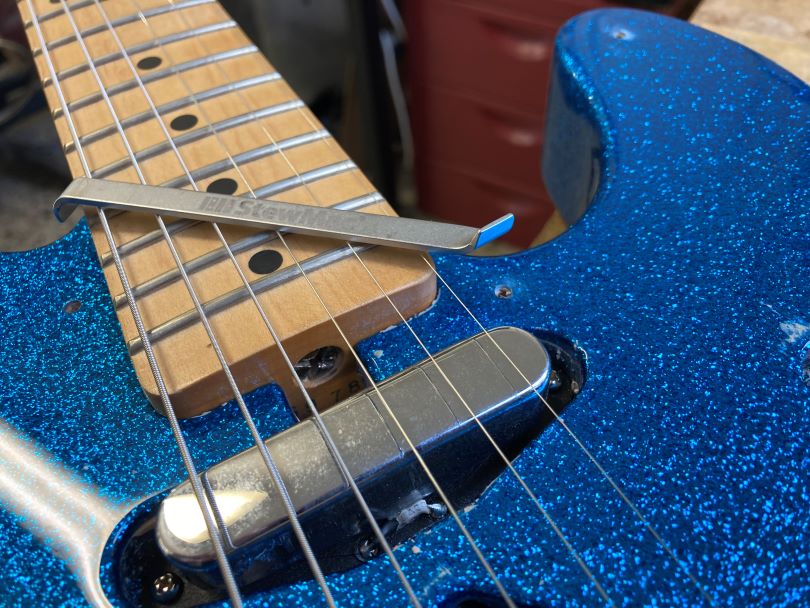
The first step is to unscrew the pickguard. Then remove the pickguard completely—it may be slightly stuck from being on the painted surface of the body for a long time, in which case it's harder to get it off. Be careful not to break the pickguard.
The second step is to adjust the truss rod. There is usually a small shaft near the end of the pickguard that allows easy access with a special wrench. Then adjust the brace as needed and check the neck geometry. Once the neck is adjusted to the ideal position, put the pickguard back on and you're done.
If you have found an error or typo in the article, please let us know by e-mail info@insounder.org.


