
Under the Hood #4: Popular Telecaster Upgrades
The Telecaster is a guitar whose simplicity encourages guitarists to change and improve it—and they often do it without outside help. It consists of dozens of different parts that can be easily replaced or removed. Upgrades may be done on electronics, pickups, replacements of neck and hardware, and refinishing. Famous guitarists give a lead in this regard because only few play a Telecaster without any modifications. Therefore, this article may be a source of inspiration for tuning this legendary guitar.
As we have discussed in previous parts of this series, the genius of the Telecaster lies in its simplicity and ease of repair. This, after all, was the intention of Leo Fender, who was aware of the needs of the market and musicians. Since the earliest years of the guitar, its players have been modifying it in their own image.
The advantage is that some of the improvements can be done by any handy person. All it takes is simple tools, a little experience, and, above all, patience. The safe bet, however, is to go to a guitar repair shop where you just need to provide the specifications and a guitar technician will take care of everything.
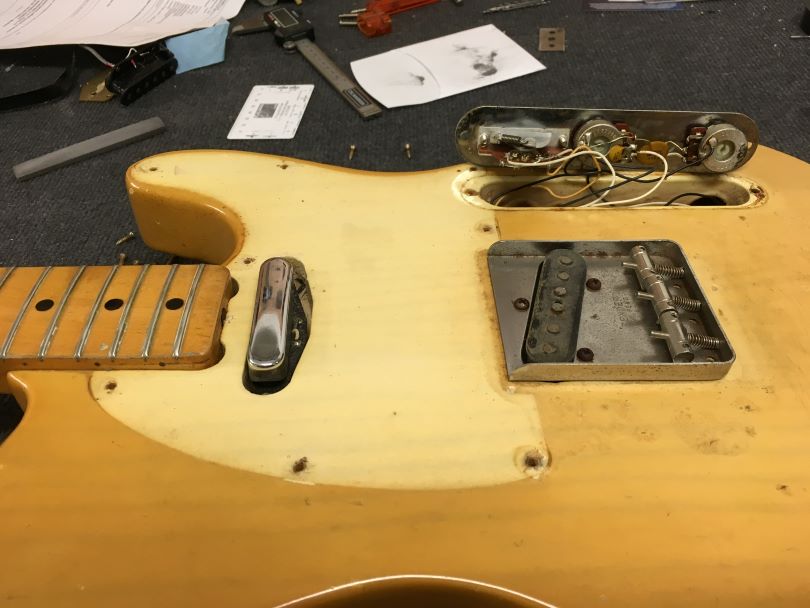
Bridge
The Telecaster’s bridge was originally designed with three saddles. That itself invites change :). There are many variations of the bridge on the market today. You can choose a higher quality material, compensated saddles, or a version with six saddles.
The bridge saddles on the first Esquires and Broadcasters were made of steel. But soon, Fender switched to brass. In 1954, however, the steel ones returned—with a different shape. So, there are two materials to choose from that exist parallelly. Each offers a different look and different sound properties.
The material of the saddles and of the bridge itself needs to be judged also in terms of quality. Low-quality material is used on cheap models, which affects especially the saddle screws that are used to adjust the height of the saddles. If the saddles are cheap, the screws slip spontaneously due to vibrations from the strings and, unfortunately, change the height of the saddles. Good quality material conducts sound and vibrations better and lasts longer. So I recommend sparing no expense on bridges and saddles.
The problem of the three saddles lies in the imperfect octave setting. However, if you are a fan of the traditional look and insist on having three saddles on the bridge, you can put modern compensated saddles on the bridge. They’re already made to simulate string compensation, and the octave tuning is accurate as a result.
If you want to have the octaves fine-tuned down to the smallest detail, you can use a bridge with six separate saddles. The look is not so traditional, but the practical benefit is great.
The bridge on the original models is colloquially called an ashtray. Firstly, because players used to remove the top cover from the bridge and actually used it as an ashtray, but also due to the fact that the bridge with saddles has raised edges and thus resembles an ashtray in shape. This type is comfortable for guitarists who have their hand resting on the edge of the bridge while playing. The edges also prevent the saddles from tilting sideways and resonating unpleasantly.
Over time, the shape of the bridge changed, for example, the raised edges were not used anymore. If you want a humbucker at the bridge instead of a traditional single-coil pickup, you need to get a bridge with a cutout for this type of pickup.
I recommend a Telecaster model with strings routed through the body. It’s more practical, especially because of sustain and pressure of the strings on the bridge saddles. If you don’t have a string-through-body Telecaster, you can get a bridge that has pre-drilled holes for the strings leading off the body, and then drill holes in the body of the guitar accordingly. If you’re not sure about your precision and ability to do that, you’d better leave this modification to a professional.
If you are replacing a Fender bridge, there is a good chance that all the holes in the bridge will fit the pre-drilled screw holes in the guitar body. It is important to check the compatibility of the bridge with older models. On their products, Fender usually gives compatibility with different model lines of guitars. If you buy a bridge of a different brand, you may have to drill new holes for the screws, or modify the pickguard in case that the new bridge is larger.
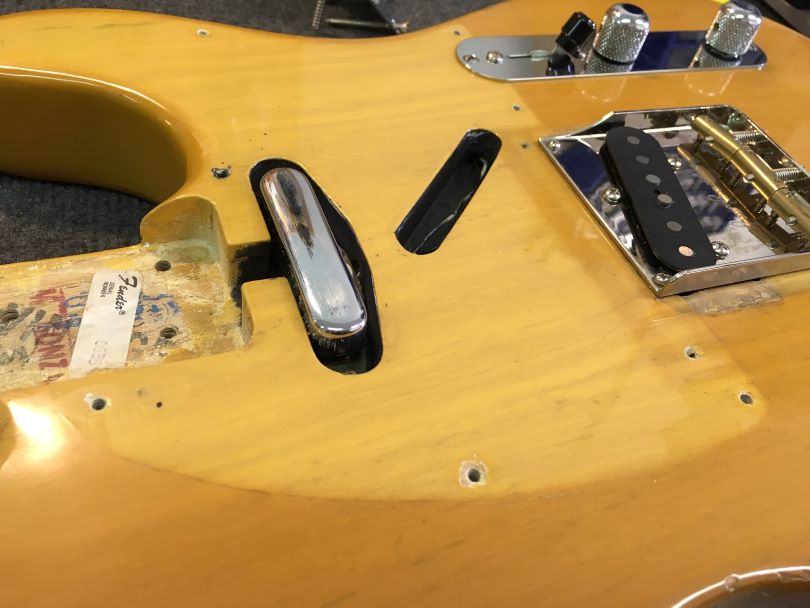
Pickup replacement
A popular tweak not only on Telecasters, but on electric guitars in general, is to change pickups. The first Fender Esquire had only one bridge pickup. The Broadcaster and Telecaster models already featured two pickups, one at the bridge and another at the neck. Fender usually put single-coil pickups on these models to achieve their typical sound.
When replacing pickups, it’s important to think about the sound you expect from the new ones. If you choose single-coil pickups, a simple pickup-for-pickup swap is all you need during installation. Size-wise, all kinds of singles should fit without any modifications to the body or bridge. A mini-humbucker will also fit nicely in the single pickup cavity as it is the same size.
If the choice falls on humbuckers, in many cases the existing pickup cavities on the body must be re-milled to accommodate the larger pickup. Some of today’s Telecasters have humbucker cavities already milled under the pickguard. If you own such a model, changing pickups is easier. However, it is necessary to modify the pickup hole on the pickguard. Bridge humbucker is tricky in that you need to get a bridge with a cutout for a larger pickup.

Wiring replacement
The Telecaster would encourage you to upgrade the wiring of the pickups in particular. At first glance, you may be surprised at how many wiring options the single-pickup Esquire model offers. There is a different wiring configuration at each position of the three-position switch. The first one offers a clear pickup, in the middle position the signal is routed through the volume and tone potentiometer, so it is slightly cut down. The third position is modified by wiring a capacitor and resistor, which adds a bass tone to the pickup. One pickup and so many wiring options! The sound can be changed by simply adding capacitors and resistors of different values.
The classic Telecaster with two pickups was originally made with a three-position switch, but today it is common to find a switch that has four or five positions. So you can switch not only between the pickups themselves but also change, for example, the series and parallel connection.
Telecasters with three pickups are an interesting variant. They offer more wiring possibilities. Popular today are S1 potentiometers and superswitches, which multiply the wiring possibilities even more.
You can also change the potentiometer values. This will influence the character of the sound according to your preferences. With a combination of custom wiring, pickups, and capacitors you can create a completely unique sound. The electronics are easily accessible on the Telecaster.
In this regard, I recommend your favorite guitarists as inspiration, as they usually modify their wiring to their own specifications. It’s also a good idea to consult wiring options with a guitar tech who has experience with electronics modifications.

Rotating the electronic control panel
One man’s detail, another man’s great convenience. We’re talking about the electronic control panel and its layout. Many guitarists rotate it, putting the pickup switch further away from their hand. That means the potentiometers are then closer to their hand—moreover, they can also be swapped between each other. As one chooses.
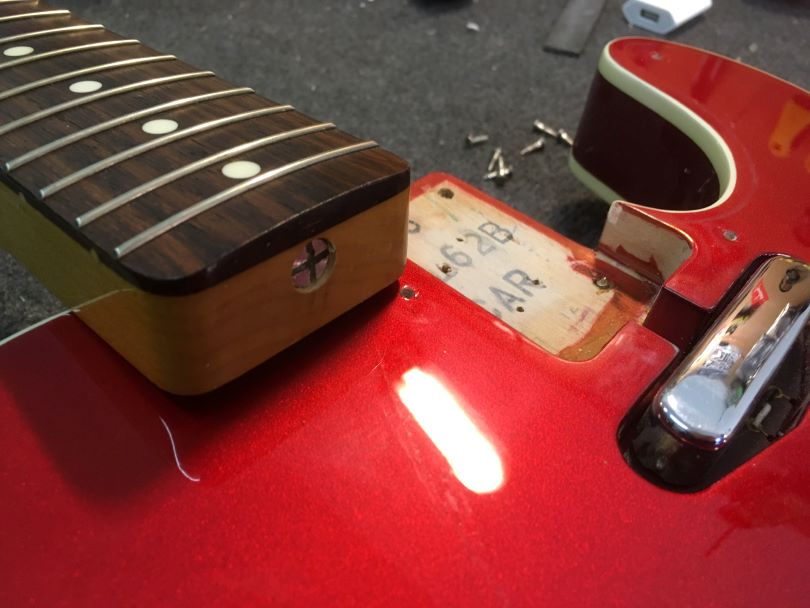
Neck replacement
Over the years, Fender has evolved neck sizes and shapes. I described these for Telecasters in more detail in the second part of this series. Therefore, I would now like to focus mainly on the neck replacement option as an upgrade to the instrument.
The neck greatly affects the feel of your playing and how you improve as a player. If everything is customized to your hand, it’s ideal. However, there are cases where guitarists go for a change, either for the sake of greater playing comfort or because of the quality of the new neck. If you want to change the neck profile, fretboard radius, neck width, or material, just replace the neck. There are countless options on the market today. For example, a Warmoth neck can be completely custom configured.
And the best part at the end. All you need to replace the neck is a screwdriver. Just take off the strings, unscrew the screws holding the neck to the body, take off the old neck, and put on a new one. You don’t glue the neck, just fit it into the body pocket and screw it on. This is, of course, the ideal case. Sometimes it is necessary to adjust the tilt of the neck against the body and so on. But we’ll talk more about that in the next part.
Refinish
A popular modification for electric guitars is refinishing. It’s a more expensive option but often worth it. There are several reasons for this change. The finish may be damaged, faded, of poor quality, or the color just may not suit the owner’s eye.
A guitar maker may help you choose the preferred shade of the new finish. The choice is virtually unlimited today. Fender sometimes offers an interesting combination, called matching headstock, where the headstock on the front is painted the same color as the body. A spectacular impression is guaranteed.
Always pay attention to the quality of the paint and the workmanship. The work should be done by someone experienced because the finish affects the final sound of the instrument. Of course, pickups and electronics play a significant role in electric guitars, but the finish does not lag behind.
Notice, for example, how thin the lacquer layer is on Fenders from the 1950s and the first half of the 1960s. By contrast, the manufacturing process changed in the seventies, and, sometimes, the layer used is in this decade may stun us. This is also why many 1970s Fenders ended up being refinished.
To close
Telecaster upgrades are popular not only among guitarists but also among guitar technicians. This guitar offers a large number of options for what and how to upgrade, modify and change. That all corresponds to Leo Fender’s vision—to meet the needs of guitarists and make guitars that fulfill the demands of the time as much as possible. Thus, the Telecaster first saw the light and has endured to the present day, with guitarists still adapting it not only to their capabilities but also to the times in which they live.
If you have found an error or typo in the article, please let us know by e-mail info@insounder.org.


